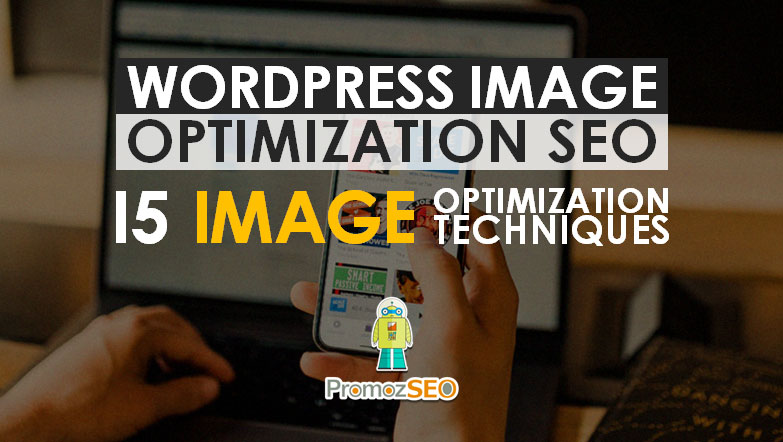
Image Optimization SEO: Optimize Images for WordPress and E-commerce Websites
Today in the age of internet marketing and content marketing, visual contents play a vital role in engaging your website visitors and converting them into paying customers. However well you do the on-page SEO if the images are not properly optimized; you are bound to experience lower search engine rankings and thus, less traffic to your website, and ultimately fewer sales conversions.
So, how to do the image optimization so that it not only ranks high on Google image searches but also engages your customers with your website and makes them buy from you?
The answer is simple, SEO website images properly following the guidelines.
But before we start showing you the right way of doing image SEO, let’s first see the reasons why you should optimize the images and how it benefits your WordPress or e-commerce site?
Benefits of Image Optimization
Images are powerful, period! And, optimized images have two-fold benefits. How?
Well, let me explain.
Let’s first focus on the “user” part.
Optimized Images are Crucial for User Experience and Engagement
Do you love reading content that doesn’t have relevant images to show? Isn’t it boring? I wouldn’t say I like it, and I believe that most of you don’t as well.
As human beings, we like to engage in contents that have a lot of high-res pictures, screenshots, and other rich media contents like infographics, GIFs, videos, etc. that explain something visually.
When we visit a website, be it a simple WordPress website or an e-commerce store, if we see interesting and attractive images, we pause and check them. This generally happens due to two reasons. Maybe the image graphics are so beautiful and innovative that they made us stop there and check them. Or perhaps the image has explained something so systematically that we had to focus on it. But whatever could be the reason, this substantially increases the “average session duration” of the site, which in turn reduces the “bounce rate”, and thus helps in better search engine rankings.
But not only this. For an e-commerce website, images are as crucial as its product descriptions. If you visit an e-commerce product page and see a few low-quality images, it will immediately turn you off and make you exit the page. And I think this frequently happens with many online stores.
So what made the e-commerce site lose a potential customer? The low-resolution images.
This means, to engage your visitors intuitively with your content, you must have beautiful images to show on the page. Else, this will create a poor user experience which will lead your visitors to exit your website, thus increasing the “bounce rate”, reducing the “average session duration”, which will finally, take down the site’s organic rankings.
Optimized Images are Indispensable for SEO
Now that you know that images enhance the user experience of a website, which in turn helps to improve the SEO, let’s now see some direct SEO benefits of optimized images.
On the one hand, as we know that appealing, high-resolution images influence users’ experience significantly, on the other hand, we must make sure that they load fast on web browsers, especially on mobile devices.
You should know that if your website takes more than 3 seconds to load completely, you are losing nearly half of the website visitors. Additionally, a one-second delay in the website’s loading time decreases its conversion rate by 7 percent.
So, now you can do some maths to figure out how much loss you are incurring every day.
You will be surprised to know that most of the losses you are making in this regard are due to the large, high-res images you used on your website. When you used them to charm your site visitors, they are now backfiring you by reducing your traffic and sales.
So, what exactly went wrong here? The images?
No, not the images. And yes, the images.
What does this mean?
Well, see, high-resolution images are effective in drawing visitors’ attention only when they see them. But what if most of your visitors exit the website because it is too slow to load?
Does it make any sense? Certainly, not.
So what do you do then?
You need to SEO the images correctly to make them load faster, which ultimately results in a fast-rendering website, and that once and for all solves your problem.
So now that you know the advantages of image optimization and how fast loading, high-res images can improve user experience and increase site’s stay-time and sales conversion rate, let’s now head straight to the main topic. And that is, how to optimize images.
15 Steps of Image SEO for WordPress and E-commerce Websites
I am going to break down the entire image optimization process into 15 steps that will help you follow and implement them effortlessly for your WordPress or e-commerce website.
#1 The Image Source Play a Vital Role in Image Optimization
You love high-resolution images, your visitors love high-res images, but that doesn’t mean that you can download the image from any website you want.
If you are downloading an image from anywhere from the internet, you need to make sure that it is not copyrighted. Else you may have to face a lot of legal difficulties later on. At the very least, you may need to take the image down if it infringes the copyright act and if the real owner of the image files a DMCA (Digital Millennium Copyright Act) against you.
So what can you do? How can you get high-res images to show on your website or e-commerce product pages without a copyright breach?
You have three solutions.
First: There are plenty of websites that offer high-resolution, copyright-free images. You can use those sites to find relevant images that match the context of your content or product. Though it is not mandatory, still, you can give credit to the original creator of the image when you use it on your website.
You may use image sites like Pixabay, Pexels, Unsplash, etc. to download and use copyright-free images.
Second: Create the images in-house or outsource them. If you have a full-fledged graphics team at your office, you may take their help to design the images in-house. Else hire a freelance graphics designer who is capable of designing high-quality images and delivering them on time.
If you are creating the images in-house or outsourcing them from a trusted freelancer, make sure to include the business logo on the images.
Third: If you are running an e-commerce store, depending on your product line, you may need to arrange photoshoots to create your product-images. This works the best for any website if you or your team members (internal or external) know how to take high-res images using a camera or smartphone.
So the key point here is you have to use copyright-free images on your website for the best image-SEO results.
#2 Image Type is Crucial for Image Optimization
Now before you download, create, or take an image, know the image file types that are the best for your website and image SEO.
We see three types of image files, mostly on the internet, namely JPEG, PNG, and GIF. When these are extensively used image types, they have their own merits and demerits in terms of image optimization.
JPEG (Joint Photographic Experts Group): JPEG image file type is by far the best for image SEO. JPEG or JPEG is suitable for large size images for its color accuracy and clarity. But what makes JPEG the best for SEO is its relatively small file size.
Nearly 72.3 percent of sites use the JPEG image file type, which makes it the most widely used image type on the internet.
As we know from our previous discussion that the site’s loading speed is one very strong signal for search engine ranking, so from the beginning, we must take care of the image file size. Images are one of those website components that consume the maximum space. Hence, if we can control the image file size, we can substantially reduce the page loading time, and that will eventually improve the overall optimization and organic ranking.
If you want to optimize the JPEG image further, you can use progressive JPGs, as they are more web-friendly. As the name suggests, progressive JPG format renders a blurry image version initially when the page loads and gradually sharpens the image quality. This never blocks rendering the other HTML elements of the page, which improves the page speed.

Use Progressive JPEG image
PNG (Portable Network Graphics): PNG is the second most used image file type after JPEG. PNG file type is primarily used for images that require a transparent background, like a small icon, a button, etc.
They are relatively larger in size than the JPEG images; therefore, avoid using the PNG file type for large images. Use JPEG instead.
GIF (Graphics Interchange Format): GIF file type is used for animated images. This image file type is also larger than that of a JPEG image file and is not that SEO-friendly. GIF images are used on websites mainly as short videos, which if used contextually can improve the user-engagement significantly. Around 26.6 percent of sites are using GIF images, which is increasing because of its “user-engagement” benefits.
Google recommends the WebP image file format as it delivers the best quality of the image while ensuring the smallest file size. However, be careful while using WebP images. As of now, this file type is compatible with a few browsers and CDN providers.
#3 Image Text to Optimize Images
After you download or create the image, you must add relevant texts to it to make it more SEO and human-friendly. This is an important image optimization technique that you must apply at least to the first image (cover image or banner image or hero image) that you are going to display above the fold.
This becomes even more essential when you download a copyright-free image from an external source to show as your primary image.

Add and optimize image text
I am sure; you know the fact that Google doesn’t index content that is duplicate, which is used earlier on a URL and indexed already by Google. But most of the time, we think that content refers to the written content only. However, this isn’t the case.
In reality, images are also content, and like your written copy, if you duplicate an image on your website, Google may not want to index it against the content (URL). This may lead to no traffic from image searches.
Besides, images are nothing but a bunch of pixels and colors. As human beings, we can memorize (index) any written content, but when it comes to an image, we cannot do it.
Why?
Because there is no text on the image which makes it impossible to memorize.
So, now if you think it from the search engines’ perspective, how come Google indexes the image if it doesn’t have the relevant text on it describing its topic?
Well, you have to add the text to the image to make it unique on the web and search engine friendly. Google’s image processing techniques help it read the text you added on the image, which makes the image optimization and indexing far better.
So, how to add text to the image?
There are several ways you can do this. If you know Adobe Photoshop, you can use it; else make use of online image editing tools like Canva to add text to images.

Use Canva image creator
While adding text to the image, make sure, the text is clearly visible and readable. Also, confirm that the added text is descriptive and has one or two important key-phrases.
If you want to use a screenshot of any webpage, make sure to take the screenshot of the portion that best describes the purpose of the image. Having some in-line texts describing the image topic makes the screenshot even more powerful in terms of SEO.
For example, if you are creating content on WordPress SEO techniques, while writing about the keyword analysis process using an image like this (see the image below) will make the image more optimized for terms relevant to “WordPress SEO”.

Optimize image screenshot
The point is simple yet effective. Help Google to understand the image better and in return, get a well-optimized image and drive heaps of traffic from image searches.
#4 Image Dimension Optimization
After you add text to the image, it’s time to optimize the image dimension. Doing it manually is better for image SEO.
So the first question is, why should you optimize the dimension of the image?
Well, let’s say you have created (or downloaded) an image that is of 5000 PX width. Indeed, you are not going to show that large dimension image on your webpage. Else this may break the UI of the website, and the site will take forever to load the image on the browser.
So what next? How do you do this?
Usually, people upload the same large image to the server and display the smaller dimension on the browser, which fits the interface. WordPress has the image settings where you can select the image dimension you want to be displayed.
Now, does it solve the problem?
No. It does not.
Why?
Because the browser is still downloading the same large size image from the server and resizing it when displaying the image on the webpage. So, technically, there is no change, and the site will continue to be slow in loading, which will indeed adversely affect its ranking and traffic.
So how to solve this image problem?
You should manually resize the image to the largest dimension you want that image to be displayed on your site. You can use Adobe Photoshop, MS Paint or online image resizing tools to do it for you.

Optimize image dimension
This will dramatically reduce the image file size, which will make the website load faster on browsers, especially on mobile devices.
#5 Image Compression for Image SEO
Using JPEG doesn’t guarantee the smallest file size. Besides, there is something called EXIF (exchangeable image file format) data which is a standard that occupies some space which ultimately makes the image larger in size.
The EXIF data is the type of ancillary tags that are commonly used to specify the photo exposure program, aperture, white balance, shutter speed, ISO speed, lens type, focal length, camera model, picture date and time, etc.
These data are useful for photographers to understand and learn how the picture is taken, using what settings, etc. But, this has nothing to do with image SEO or website optimization. Therefore, while optimizing the image, you must delete the EXIF data and compress the image file further to reduce its size.
There are a lot of third-party web-based applications, tools, and WordPress plugins that you can use to remove the EXIF data and compress the image file.
I prefer using Kraken.io because of its easy-to-use web-based interface and quality compression without much loss. Additionally, you may also use tools like ImageOptim, ShortPixel, JPEGmini, jpeg.io, TinyPNG, Optimus, WP Smush WordPress plugin, etc. Most of these image compression tools and plugins allow bulk image upload, which makes the process quick and easy.

Compress image file size
However, try to do these things manually, not using plugins. Remember, the overuse of WordPress plugins may slow down the WP website.
#6 Image File Name Optimization
Now that your image is almost ready to be uploaded on your website, you must optimize its file name. Image file name optimization is one of the most crucial image SEO techniques that is either overlooked or over-optimized.
Remember, the image file name becomes a crucial part of the image URL; hence, it must be optimally optimized to deliver the best results.
So how to optimize the image file name?
Let’s see.
But before that, always remember that the image you downloaded or created doesn’t have an optimized file name. So you must do it manually.
If you have an image like “img001.jpg”, its file name is certainly not optimized. So, for a blog topic like “image optimization seo” what should be the primary image file name?

Optimize the image file name
It can be “image-optimization-techniques.jpg” or “image-seo-techniques.jpg” or “wordpress-image-seo.jpg” or “wordpress-image-optimization.jpg”, etc.
If you are running an e-commerce website and selling “black Nike men’s Fly.by Low Ii Basketball shoes”, then the best image file name could be “nike-men-basketball-shoes-fly-by-low-ii-black.jpg”.
So what can you see from the above image file name alternatives?
- The image file name must include a relevant keyword that describes the image as well as the context clearly.
- Ideally, the image file name should be written in lower case letters.
- The words should be separated with a hyphen.
- Avoid using any special characters other than the hyphen.
- Remove stop words from the image file name.
Simple, isn’t it? Yes, that’s pretty straightforward, and if you do it correctly, you will see amazing results.
Remember, the image file name is one of those few image-attributes that Google uses to index images thematically. So a descriptive image file name with a relevant key-phrase is advisable for better image SEO.
When you have multiple images to be used for a content, use different keyphrases to optimize their file names. Using the same keyword for all the images may over-optimize the images which may get you some trouble in the future.
Besides remember, while managing a large multilingual site, translating the image file name to the local language is not recommended by Google. Instead, keep the image file name same for the local language pages that have essentially the same content written (or translated) in other languages. This helps Google identify the same image on multiple localized language pages and eventually index it correctly.
So now, when you are done with the image file name optimization, you should upload the image to the website.
#7 Image Placement Optimization
When uploading the image to your content, you must be careful about its placement.

John Mueller on image SEO
Google’s Webmaster Trends Analyst, John Mueller, has recently said In the latest Ask Google Webmasters video series, that relevant and visible placement of images plays a significant role in their optimization and ranking.
What does this exactly mean?
- This means that you must use an image that is relevant to the context and useful for the users.
- Google will use the surrounding text of the images to understand and classify them thematically, which will ultimately influence their ranking on Google image searches.
- The most important image (cover image, featured image) should be placed at a prominent and visible position, ideally, close to the top of the page.
#8 Image Alternative Text Optimization
After you upload the image to the website, you have to first optimize the image alternative text, also known as the image alt attribute.
The alt attribute has four main benefits.
First. The image alt attribute text gets visible when due to some reasons the image is not correctly loaded on the browser.
Second. Image alt attribute helps blind or visually impaired people know the image, which gets read out by text-to-speech synthesizers.
Third. Alt attribute text helps search engines classify and index images thematically.
Fourth. Image alternative text may work as the anchor-text when the image links an internal page of the website.

Optimize image alternative text
Now let’s see how to optimize the image alternative text for better image SEO.
- Missing or a blank image alt attribute is a semantic error. That means you must use an image alt and put some descriptive text there for the image that you load with HTML.
- Use the most relevant keyword that best describes the image and the topic. As I told earlier, image alternative text is used by search engines to index the image correctly.
- Use different alternative texts if you have multiple images on a page. Using the same alt text may index the wrong image.
- Ideally, the image alt text should be written in lower case.
- Use space to separate words in image alternative text.
- Other than the keyword use modifiers that further describe the product.
So for a topic like this, the primary image alt text could be “image optimization best practices”.
#9 Image Title Tag Optimization
Same as the Image alternative text, you should also optimize the image title attribute. Though it’s not compulsory, still, optimizing the image title attribute is advisable and has several benefits in terms of SEO and UX.
Unlike the image alternative attribute, the image title text becomes visible as a tooltip to the users when they hover the cursor on the image.

Optimize image title text
So how do you optimize the image title attribute?
- Use a descriptive keyword in the image title attribute.
- Use sentence case instead of lower case characters as the image title text may get visible to the user.
- Do not copy-paste image alt attribute text to the image title text. Preferably they should be different.
- Use different image title texts if you have multiple images to optimize on a page.
- You may consider adding a call to action text like “buy now” or “try it free” on the image title to entice users to accomplish something you want.
#10 Image Caption Optimization
Image caption appears immediately underneath the image, which makes it an essential image optimization attribute.
Same as the image title, you may or may not use the image caption as it’s not a must. However, using the image caption optimizes the image further and also helps in on-page SEO.
Google and all search engines use image caption to understand the image subject matter. So using a descriptive caption text is always recommended.

Optimize image caption text
So what to follow when optimizing the image caption?
- Make it short but descriptive, and use a relevant keyword.
- Write it in sentence case as image caption text will be visible right below the image.
- Same as the image title, you may add a small call to action on image caption as well.
- Do not stuff keywords. Period.
#11 Image Sitemap
Images are crucial for search engines to understand the topic of content. In addition to all the image optimization techniques discussed above, you should consider creating an image sitemap for your site’s images.
Image sitemap helps Google discover the image URLs that search bots might have missed while crawling the content. Therefore, it is one of the vital image optimization best practices.

Create image sitemap file
An image sitemap file contains six tags that describe the image to Google.
- Tag image:image – This is a mandatory tag that encapsulates all information about one image.
- Tag image:loc – This tag points to the image URL. It is also required to create an image sitemap file.
- Tag image:caption – This tag is optional and describes the image caption.
- Tag image:geo_location – Refers to the geographic location of the image. It’s an optional image sitemap tag.
- Tag image:title – This optional tag displays the image title.
- Tag image:license – Again, an optional tag that points to the URL to the license of the image.
When the Yoast SEO plugin automatically creates the image sitemap for WordPress websites, you may have to create it manually for a non-WordPress site; still, this is well worth doing.
#12 Responsive Image Optimization
Do you know who is visiting your website using which device? No, you don’t. However, what you should know is that a large percentage of your website visitors are using mobile devices to browse through your website. Furthermore, mobile visitors are using different screen sizes to read your web content, check your products, services, etc.
So, unless you know how to serve responsive images to your users using various devices of dissimilar screen resolutions, you are bound to waste a lot of your site’s bandwidth unnecessarily. On top of that, this may cause your website to be very slow on smartphones which may eventually fall your site’s search engine rankings.
So, what’s the solution?
The solution to this problem is serving responsive images using srcset. This image attribute allows the browser to serve different versions of an image to different screen sizes.
Here is a piece of code that serves the image dynamically depending on the users’ device and screen resolution.

Serve responsive images
Luckily if you are using WordPress (WordPress 4.4 or above) for your website, then it already is using the image srcset attribute to load different versions of an image based on different screen resolutions.
#13 Product Image Schema Markup
This is especially essential for e-commerce websites that have heaps of products to sell online. If you want your online buyers to see the relevant product information like product name, image, price, and priceCurrency on rich image viewer, you should implement product markup.
Using product markup, you can influence your customers using mobile devices to click your product image as the markup will allow an image badge to be displayed in mobile image search results.

image source developers.google.com
E-commerce websites should use product markup on their individual product pages making the product image more user and search-friendly.
Google has a comprehensive guideline about how to use product markup. You can check it to implement them correctly on your e-commerce product pages.
Same as an online store, if you have a recipe website, you can utilize the recipe structured data to enable the badge on your recipe images in mobile image search results.
#14 Image Lazy Loading, Browser Caching, CDN
We have discussed a lot about website speed and how a fast loading website gets benefitted in terms of search engine ranking. Moreover, such sites serve better user experience to its visitors.
But what if I say that you can do a few things more to accelerate further your website which will not only boost its ranking on Google search but also image searches.
Let’s see how.
If you want your website images to be fast in loading, you should implement the image lazy loading technique. This process allows the web browser to download an image only when it comes to the user viewport and thus expedites the website loading.
This is especially crucial for image-heavy websites or pages that have a lot of images to be displayed below the fold. However, you must know how to implement the image lazy loading correctly on your website. Else, this may cause potential damage to your site in terms of search engine visibility.
The next thing that you must do is enabling the browser caching. When a user revisits a website, this technique lets the browser serve the static content locally without depending on the webserver. Hence, it reduces the latency time and eventually accelerates the loading of the site.
For WordPress websites, you can use plugins like W3 Total Cache or WP Super Cache to enable browser caching. Non-WordPress website owners can use their .htaccess file to implement the same manually.

Enable browser caching
Lastly, if you have a decent budget, you may consider using a CDN (Content Delivery Networks) for your website. This technology distributes the static files of your website across different global server centers, which ultimately helps you reduce the latency time and speed up the site.
#15 Link Worthy Images
If you have been in SEO for some time, you should know the value of inbound links. How a few authoritative, relevant backlinks can skyrocket your organic ranking on Google search and image search.
So apart from developing linkable content for your website, you should also be focusing on creating images that are valuable, informative, and engaging (or entertaining). These link-worthy images may earn you powerful backlinks from influential websites that linked or embedded your image.
So what type of images help you acquire backlinks?
Infographics – These are the best when it comes to acquiring backlinks from powerful websites. However, you must design an eye-popping infographic that is insightful and engaging.
Mapographics – Another powerful visual image type that works like a link-magnet.
Data Chart – A chart that has valuable data along with an impressive graphical representation will earn you a lot of backlinks.
Funny Images or Cartoons – Who doesn’t like funny images that make you laugh? Whatever industry you represent, if you can create a few witty cartoons that talk about your niche, you can acquire fantastic backlinks from high-authority websites. Additionally, you may also get loads of social media shares.
Quotes – Quotes are powerful. Create industry-relevant quotes from influential authorities and legends, and see how they help you encash in terms of backlinks.
Make sure to include your business logo and the website info on each visual asset you are creating, and also define the copyright and license information.
Lastly, reach out to those webmasters who have used your image on their website without a backlink pointing to your site. You may use Google’s “search by image” or other reverse-image-search web apps to find out the unlinked opportunities.

Lookup images using Google search by image
# Bonus Tip – Utilize Google PageSpeed Insights Tool
When you are done implementing all the above image SEO techniques and made the page live on the web, you should visit the PageSpeed Insights tool.
Analyzing the newly created page (URL) using the Google PageSpeed Insights tool, may point out a couple of things that will further improve the loading time of the page.
Do everything you can to accelerate your site’s loading, and Google will surely reward you.
Wrapping Up
Image optimization can be an overwhelming job for a beginner. However, remember this is worth the effort, and if you focus on doing one step at a time, you will be able to SEO your images effectively.
Remember, when using an image on your content, your objective should be adding value to your readers and buyers. Similarly, when optimizing an image, you should focus on helping Google understand your image and the context clearly. If you can make sure that these two important aspects are met, your image will not only rank high on Google image searches but will also drive a lot of traffic to your content.
So, to recap, the image SEO points:
- Use copyright-free images on your content or product page
- Select the right image file type. JPEG is the best.
- Add text to images to make them contextually relevant.
- Optimize image dimension.
- Compress image file to reduce the size.
- Optimize the image file name.
- Optimize image placement.
- Optimize the image alternative text.
- Use a descriptive image title.
- Write a descriptive image caption.
- Create an image sitemap file.
- Serve responsive images.
- Apply image schema markup.
- Utilize image lazy loading, browser caching, and CDN.
- Create link-worthy images.
- Consult the Google PageSpeed Insights tool.
Now that you know the key image optimization points, I hope you will apply them to your images and get a large chunk of traffic to your website, which you were otherwise missing out on.
Finally, do let us know how this image optimization post works for you, and if you apply any other image SEO technique that is not mentioned here.
An advanced All-in-One Digital Marketing Course.
Mentored by Mr. Soumya Roy, the Founder, CEO of PromozSEO Web Marketing Academy.

Being an entrepreneur and digital marketer, he loves to share his knowledge and experience in topics related to internet marketing, SEO, SEM, social media, content marketing, branding, entrepreneurship, and many more.
- Reasons Your Business Needs to be on Instagram - September 16, 2021
- 7 Reasons Your Business Should Invest in Professional Content Creation - August 12, 2021
- 5 Ways You Can Improve Your Website’s Existing Backlinks - April 30, 2021


One Response
As a small business, you can’t do it all alone you need digital marketing companies’ help.
Comments are closed.