
A Step by Step Guide About How to Use Google Search Console (Google Webmaster Tool)
If you are into Search Engine Optimization or going to enter in this industry then you most probably know about Google Search Console (aka Google Webmaster tool). This is one of the most important tools for all optimizers and most probably for all digital marketers.
This is a free tool from Google where you can get one website’s all On-Page, Off-Page and technical SEO details and errors. This data will help you to gauge your site’s overall performance measured by Google search engine. This is one tool which you must use throughout your SEO journey.
Once your site’s initial on-page SEO is done and the site is live on internet the first job which you should accomplish is to integrate Google Search Console with your website. If you do so, you will get different data about your site on this tool which will help you to improve your site’s optimization, user experience and ranking on search engine result page (SERP).
In this article, we are going to discuss all details about this crucial SEO tool in depth. This will surely help you to use and understand Google Search Console more efficiently than ever.
We are going to discuss the below mention points:
- Search Console Integration
- Search Console Dash Board
- Crawl
- Crawl errors
- Crawl stats
- Fetch as Google
- Robots.txt tester
- Sitemap
- Index
- Index status
- Blocked Resources
- Remove URLs
- Search Traffic
- Search Analytics
- Links to your site
- Internal links
- Manuals action
- International targeting
- Mobile usability
- Search Appearance
- Structure Data
- HTML improvements
- Accelerated mobile pages (AMP)
Search Console Integration
Once your site is ready, up and live on internet you must first integrate
Google Search Console with your website. You may use your existing Gmail ID but
it is recommended to create a new Gmail address and use that for the integration
purpose.
First, log in with your Gmail ID on Google, and search with Google Search
Console. You may see Google Search Console URL coming with a CcTLD (Country Code
Top Level Domain, example; .co.uk, .com.au, .co.in etc.), and you may also see
another Google Search Console URL coming with .com GTLD (Global Top Level
Domain). Click on the .com URL.
As you are already logged in on Google, you will be directly taken to Search Console home page. You will see one ‘add property’ button and besIDe that, you will get the field to put your domain.
Before you add your site to Google Search Console please check your sites
protocol (HTTP or https) and also check the subdomain (www or without www).
Once you know your site’s protocol and subdomain make sure to put the domain
with the same protocol and subdomain on the add property field.
Example
Assume your domain is ‘example.com’ and it is opening with HTTP and www. This
means when someone tries to open your site on browsers your site will open like
http://www.example.com. You must put exactly the same on the ‘add property’
input field.
After doing this click on the add property button. You will be taken to the
next page where you will get one recommended method and another alternate
method.
On recommended method, you have to integrate your site with Search Console by uploading a verification file to your sites servers root folder. Hence you will need your site server access.
In this method, there are four steps through which you will integrate the site with Google Search Console tool.
- Download the verification file and save it to your local system. Do not change anything of this file, not even the file name.
- Log in to your site's server using any FTP (File Transfer Protocol) software like Filezilla or SmartFTP, or you can log in to your site’s CPanel too. Once you are logged in to your website’s server please click on the public_html (or www) folder. Upload the file which you have downloaded from Google Search Console, on your server’s public_html folder.
- Move to Google Search Console and click on the link mentioned there as step 3. If you do not get any 404 error (page not found), that means the file uploading process is successfully done.
- Click on the verify button. You will be taken to the next page and you will see one successful message saying, your site is successfully integrated with Google Search Console.
To execute the recommended method you must have website’s server user ID and
password. In case, the site is on a CMS and you have site’s admin user ID and
password, but you do not have site’s server credentials, then you have to use
the alternative method.
In the alternative method, you will get multiple options to add your site with Google Webmaster tool. The easiest option is the HTML Meta tag.
- Select the first radio button and you will get one Meta code there.
- Next, log in to your site’s admin panel. If it is a WordPress site, log in to the wp-admin section. Once you are logged in, go to WordPress appearance, from appearance go to editor, find out the header.php file. Open header.php and find out the </head> line.
- Copy the Meta code from the Google Search Console tool and move to the WordPress header.php file. Paste the Meta code before the </head> line. Save the file and move back to the Google Search Console. Click on the verify button. You will see a similar message saying, your site is successfully integrated with Google Search Console.
Any of these two methods you can use to integrate your site with Google Webmaster tool. Once it is integrated you will be taken to the Search Console dashboard.
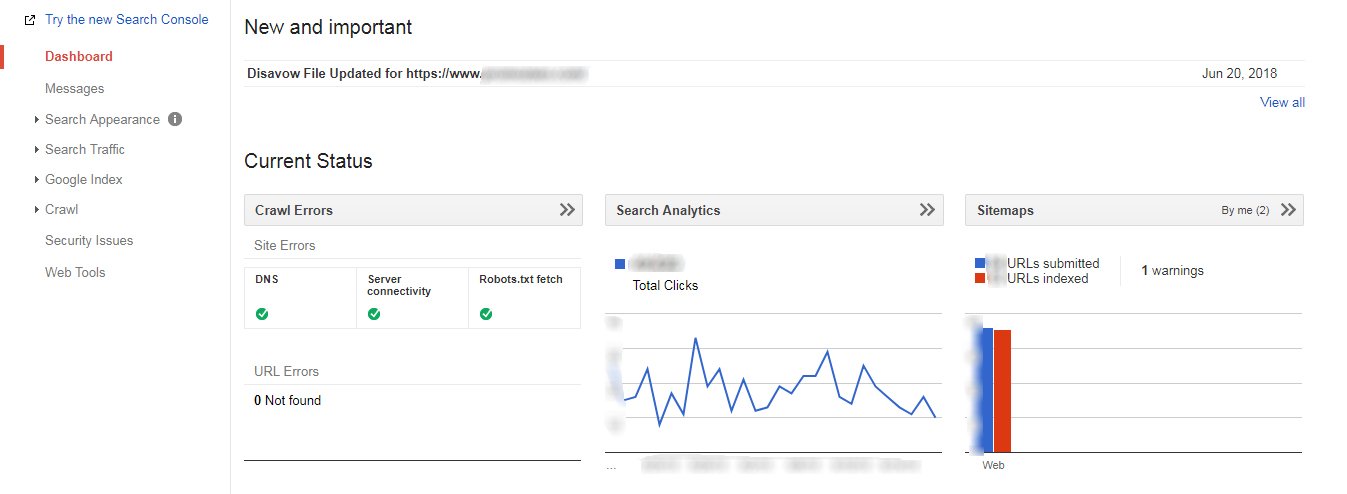
Search Console Dash Board
Once you are on Webmaster dashboard page, you will see four different
information there. At first, you will see the list of messages coming from
Google Search Console itself.
Next, on the current status section, you will see one data and two graphs. First data is the crawl errors data, second one is the search analytics graph, and the third one is the sitemap graph.
This dashboard will list all the things Google is experiencing on your site at present.
Crawl
Under crawl section, you will get five important data.
Crawl Errors
Under crawl error section you will see Site Errors and URL Errors.
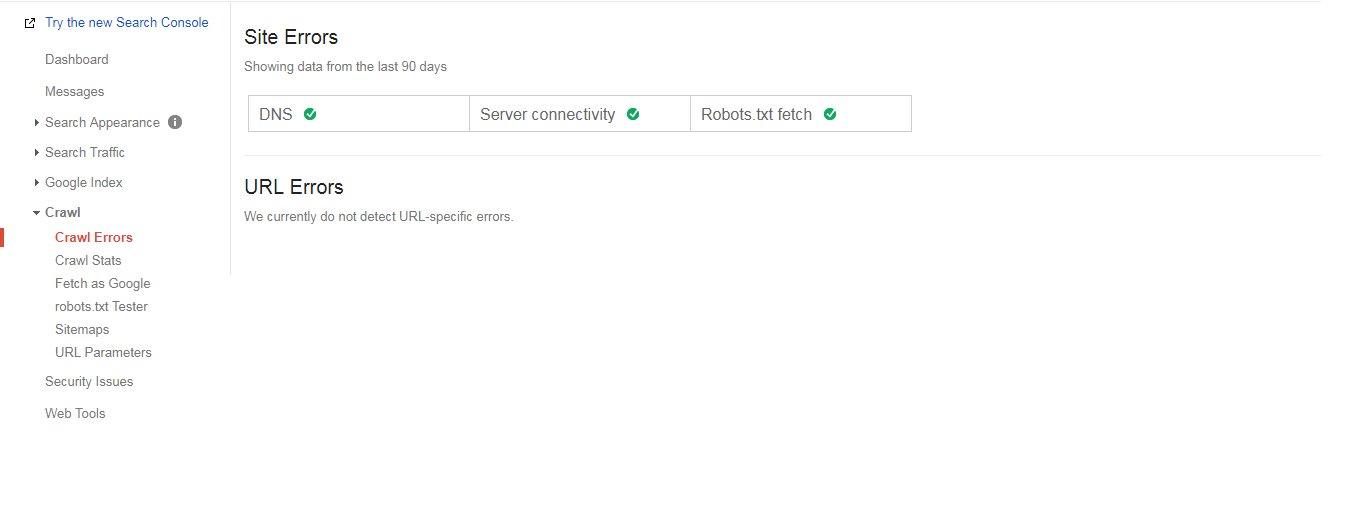
Site Errors
Under site errors, you may see three different error messages.
- DNS error
DNS full form is domain name server. In general, there are two names servers,
name server 1 (NS1) and name server 2 (NS2). These two name servers are used to
connect a domain to its hosting server.
If any one of these name servers is not working, your site still may open on
browsers, but Google may not be able to crawl your site. If this happens you
will see a DNS error listed under site error section. If Google is unable to
crawl your website, it won’t be able to index its pages, and therefore, your
site will not rank unless the DNS error is resolved.
Unfortunately, as a search engine optimizer, you cannot solve this DNS problem. If it is your own site, take a screenshot of this page, contact with your server company and you may also need to send the screenshot as an email attachment to them. Few days after the DNS issue is resolved, you won’t see the DNS error signal anymore under the site errors section on Google Webmaster tool.
You may have to do the same thing for your clients’ website if you are a remote SEO freelancer or consultant.
- Server Connectivity Error
Sever Connectivity Error may happen due to any problem with the server. This may include server downtime, server misconfiguration, server maintenance, high traffic load and so on.
If this happens same like DNS error as a search engine optimizer you cannot
do anything. But contact your or your clients’ server company with a screenshot
of the problem as an email attachment.
Similar to DNS error if server connectivity error happens, Google bots won’t be able to crawl your website. Therefore your website and webpages may not be further indexed or re-indexed. Finally, this error will cause potential problem for your site's performance on Google search engine result page.
- Robots.Txt Fetch Error
Google Search Console shows this error if it is unable to fetch (access) website’s robots.txt file.
Robots.txt file is one of the most important files your site must have. Due
to any reason if Google is unable to fetch this file, that can create problems
to site’s crawling and indexing. Hence that will create problems for the
website’s ranking.
There can be four different reasons why Google may not be able to access robots.txt file. You may need to check all of those one by one, if you see a robots.txt fetch error under site errors sections on Google Search Console tool.
- Check whether the robots .txt file is there on your website or not. You can do this easily by typing http://www.example.com/robots.txt. If you do not see anything or if you get a 404 error page, then the txt file is not uploaded on your website’s root folder. Log in to your server with FTP software and move to the public_html folder. Check if the robots.txt file is there or not. If you do not see, you have to first create the robots.txt file and then upload it to server’s public_html folder.
- Google may not find the txt file if it is uploaded to an internal folder of the server. In this case, you have to upload the robots.txt file on the root folder, public_html. And remove if there is another robots file in any of the internal folders.
- If the txt file is not properly named, then Google won’t be able to fetch it. You may see that there is a file in the root folder of the server but the file name is robot.txt. The file name should be robots.txt. If you see such issues you may have to rename the file as robots.txt.
- You may see robots file with an extension anything other than the . Robots file is a text file and the extension should be .txt. If you see a robots file with .html or .php or .asp or .jsp or anything other than .txt you have to rename the file to robots.txt.
URL Errors
Under URL errors, Google Webmaster tool may list two kinds of errors, 404
(page not found) and Soft 404 errors, for the desktop and mobile versions.
404 error occurs if one URL does not exist and someone is trying to open that
in a browser. If this is happening in large numbers that can cause problems for
user experience and ranking. If you see any such 404 URL, you have to redirect
that non-existing URL to an internal, relevant and existing URL permanently
(301).
Soft 404 URL errors happen for two reasons.
- The first reason is, if you have redirected a large number of 404 URLs to the site’s homepage, which is not recommended. You should redirect one non-existing URL to one existing, relevant, internal URL.
- The second reason is, if Google is unable to access an URL, but the URL is not giving a 404 HTTP error code.
Crawl Stats
Under crawl stats, you will get three graphs.
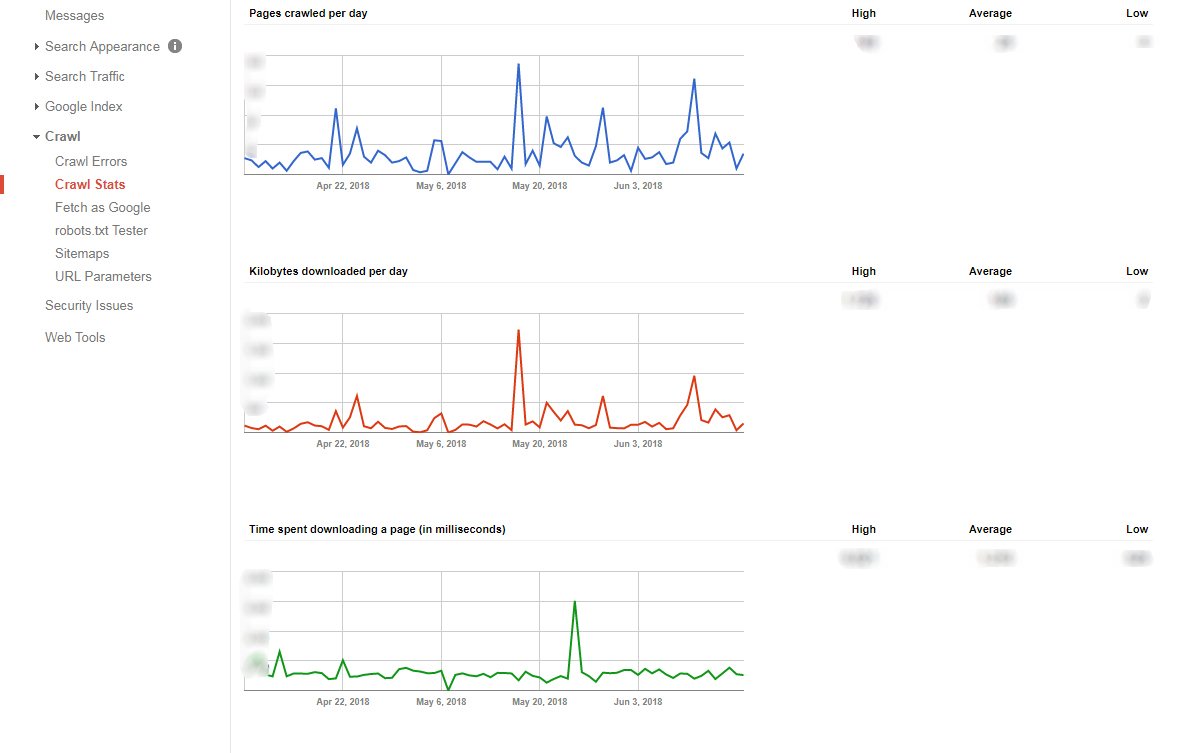
- Pages crawled per day: This graph tells you about how many pages are crawled per day in last 90 days. The more pages are crawled by search bots, it’s better for the site.
- Kilobytes downloaded per day: This graph shows how much kilobytes Google is downloading per day. This and the previous graph look very similar. If Google crawls more pages that means Google is downloading more kilobytes. Therefore if Google bots download more kilobytes, that’s going to be good for the website.
- Time spent in downloading a page (in milliseconds): This graph tells about how much time Google bot is taking to download a webpage in milliseconds. 100 milliseconds mean 1 second. The less time Google crawler takes to download a page, is better for the site.
There are several things you can do to make the site load faster on the browser and mobile devices. This includes using GZip compression, using browser caching, using CDN (Content Delivery Network) etc.
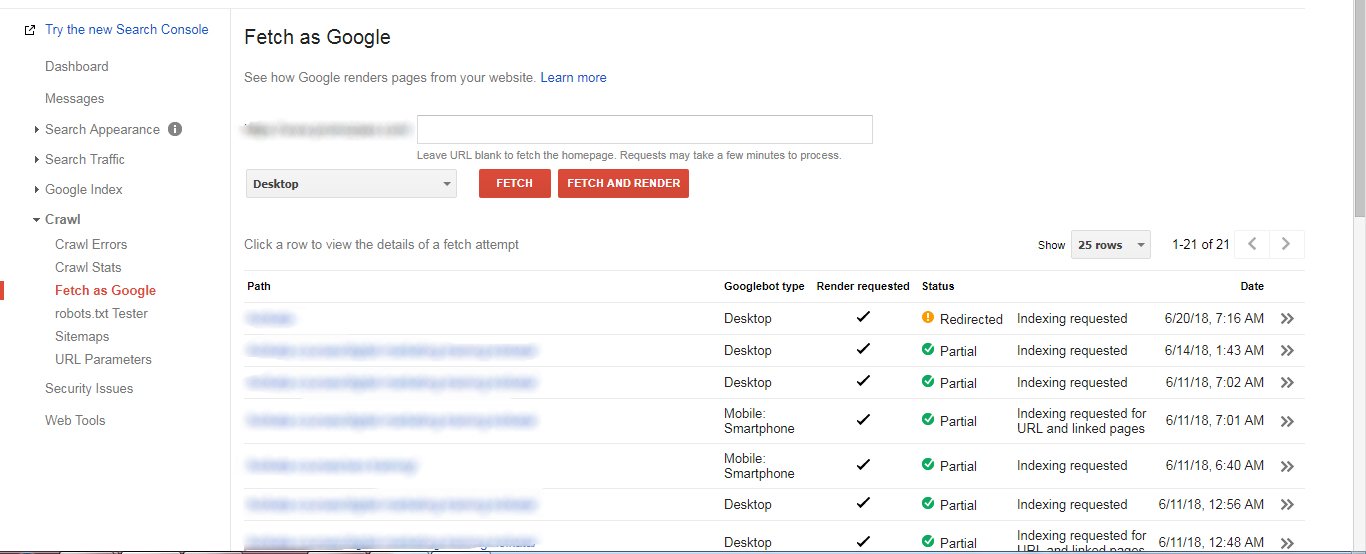
Fetch as Google
This is one of the most important things you can do using Google Search
Console. Fetch as Google means telling Google to crawl a page of the site. If
you move to this section you will see two buttons Fetch, and Fetch and Render.
BesIdes that, you will get one input field where you have to put one page URL
removing its domain part.
Once you integrated Search Console and your website, next you should fetch all your site’s important page URLs including the home page URL, using fetch as Google option.
Let’s say, we want to fetch one internal page of example.com, and the page
URL is http://www.example.com/google-search-console/. Copy the slug portion of
this URL (i.e. Google-search-console/) and paste it on the fetch as Google input
field. Next click on either Fetch or Fetch and Render button. Additionally you
will see one drop-down menu with two options, first is the desktop/ laptop and
the second is the smartphone. You should fetch one URL for both these options
one time each.
Once you fetch a URL using Fetch or Fetch and Render button you will further
see the ‘Request to Index’ button. Click on that and you will see one pop up
with two options. The first option will be ‘Crawl only this URL’ and the second
option will be ‘Crawl this URL and its direct links’. You can use the first
option 500 times in a month and the second option can be used only 10 times in a
month for one website. Hence you should use the first option to fetch more
general pages and should use the second option for more important pages of your
website.
The difference between ‘Fetch’ and ‘Fetch and Render’ is, if you use ‘Fetch
and Render’ in addition to fetching you can also see how Google is rendering
your website and how it is different from the user view.
This entire process ensures quicker crawling of those fetched URL's by Google bots. Therefore this is very important for quicker indexing, though it does not guaranty anything.
Robots.Txt Tester
In this section, Google will show errors and warnings if it is facing any
difficulties with robots.txt file codes. We generally use a robots.txt file to
authorize or block search engines from crawling one website. It is also used to
block one particular section or a page of the site from being crawled by search
engines. If Google gets any errors written in this file, Google will list that
error or warning in this section.
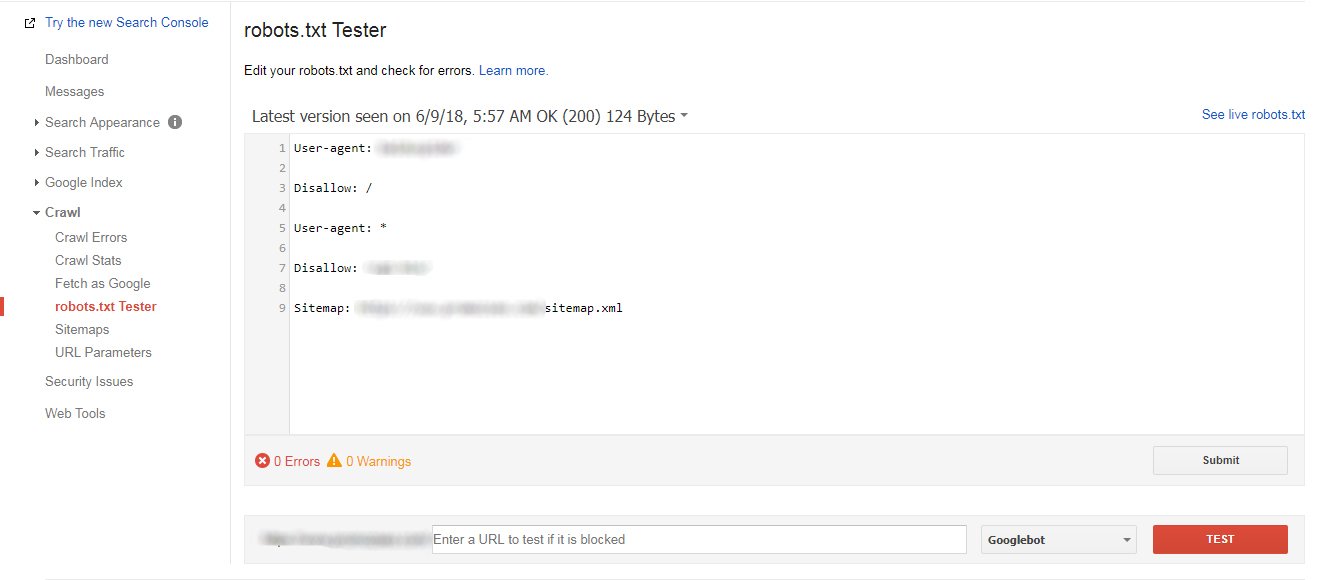
If you see any such error or warning messages in this section, you have to correct those.
This section has an additional feature where you can analyze if any pages of the site are blocked using robots file or not. This will help you to identify those resources which are blocked and further you can unblock those if required.
Sitemap
From this section, you will be able to add or resubmit your website's
sitemap.xml files on Google Search Console tool.

Sitemap.xml file is one of the traditional files we used to keep on our
websites. In the beginning, this file used to help search engines to learn about
all the internal URL structure of a website. Today search engines are advanced
and even those are equipped with different artificial intelligence and machine
learning technologies. Therefore they do not need a sitemap.xml file to know all
the page URLs of a website. Still, Google Search Console has this sitemap
section to add and further resubmit, therefore we should utilize this.
Once your site is added to Search Console you should come to this section and
add your sitemap files using the Add Sitemap button.
Once your sitemap file is added on Webmaster, after that if you create a new page on your site, each time you must update the sitemap file using the resubmit button for quicker crawling and indexing.
Index
This section gives you three very important details.
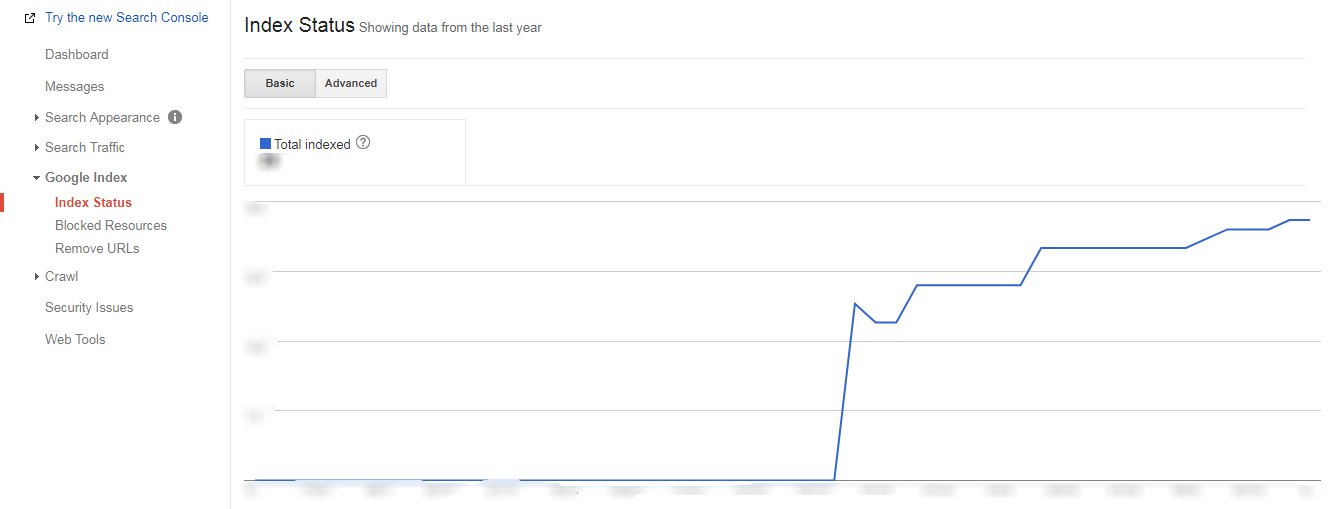
Index Status
In this section, you will see one number along with a graph. The number
represents the number of webpages indexed by Google search engine till date. The
more number of pages Google indexes is better for the website. This section will
show you the number but won’t show you those pages which are indexed by Google.
If you want to see the actual page URLs which have been indexed by Google
till date, you should open a browser and go to Google and search with site:
domain name (e.g.; site: example.com). This operator search will show you all
the indexed page URLs of a website on Google search engine result page.
If you see a stiff fall on the index status graph that is clear signal that there might be some problem (maybe even a penalty) with the website. That is the reason Google is de-indexing your website’s already indexed pages. Therefore you may have to analyze your site to know the actual reasons for those de-indexing.
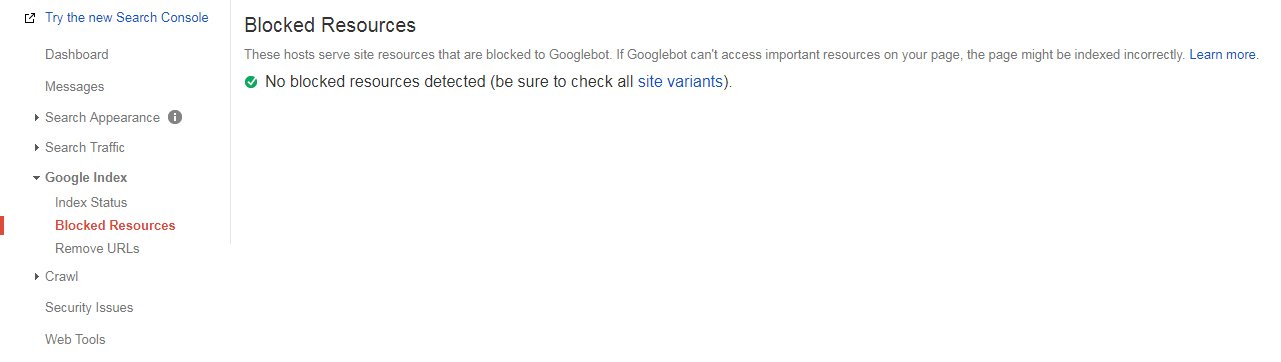
Blocked Resources
In Blocked Resources, Google will list all the resources which are blocked
and Google is unable to access.
On a website, almost all the resources (webpages, CSS files, JavaScript
files, JQuery files, images or any multimedia files) should be public and
accessible by search engines. Without any solid reasons, we should not block
anything from Google or other search engines.
If you see one or a list of resources listed there under this section that simply means that Google is unable to access those. In that case, you have to check the reasons for those blocks. If those are blocked by mistakes then you have to unblock those from Google using robots.txt file.
Remove URLs
This feature helps you to remove one URL temporarily from Google search
engine results page.
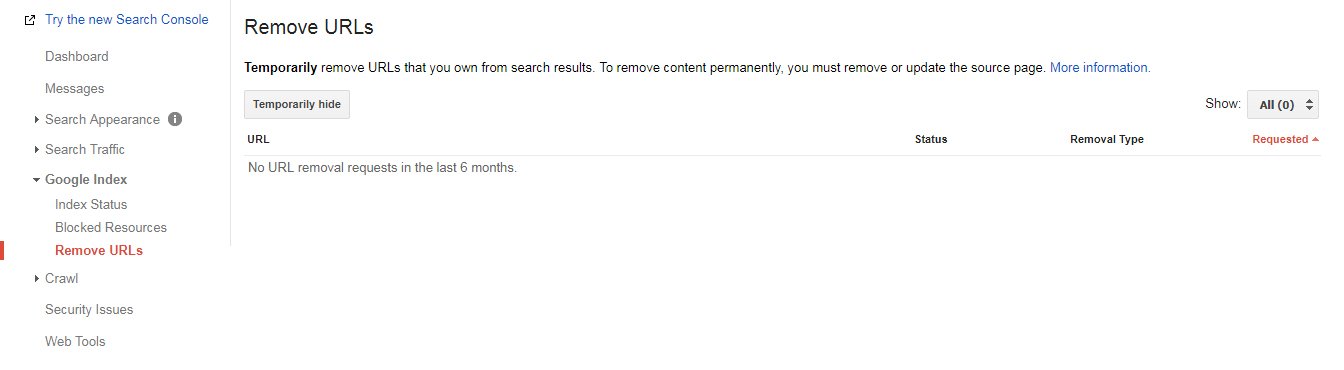
There can be several reasons when we may want to hide a page from Google and do not want it to rank. In that situation, we have to use this feature of Google Search Console. In future, if you want the same URL to rank again you can un-remove the URL from here.
Search Traffic
Under search traffic section you will get six very important details of your site. Some of those are absolutely crucial to measure site’s performance on Google search engine.
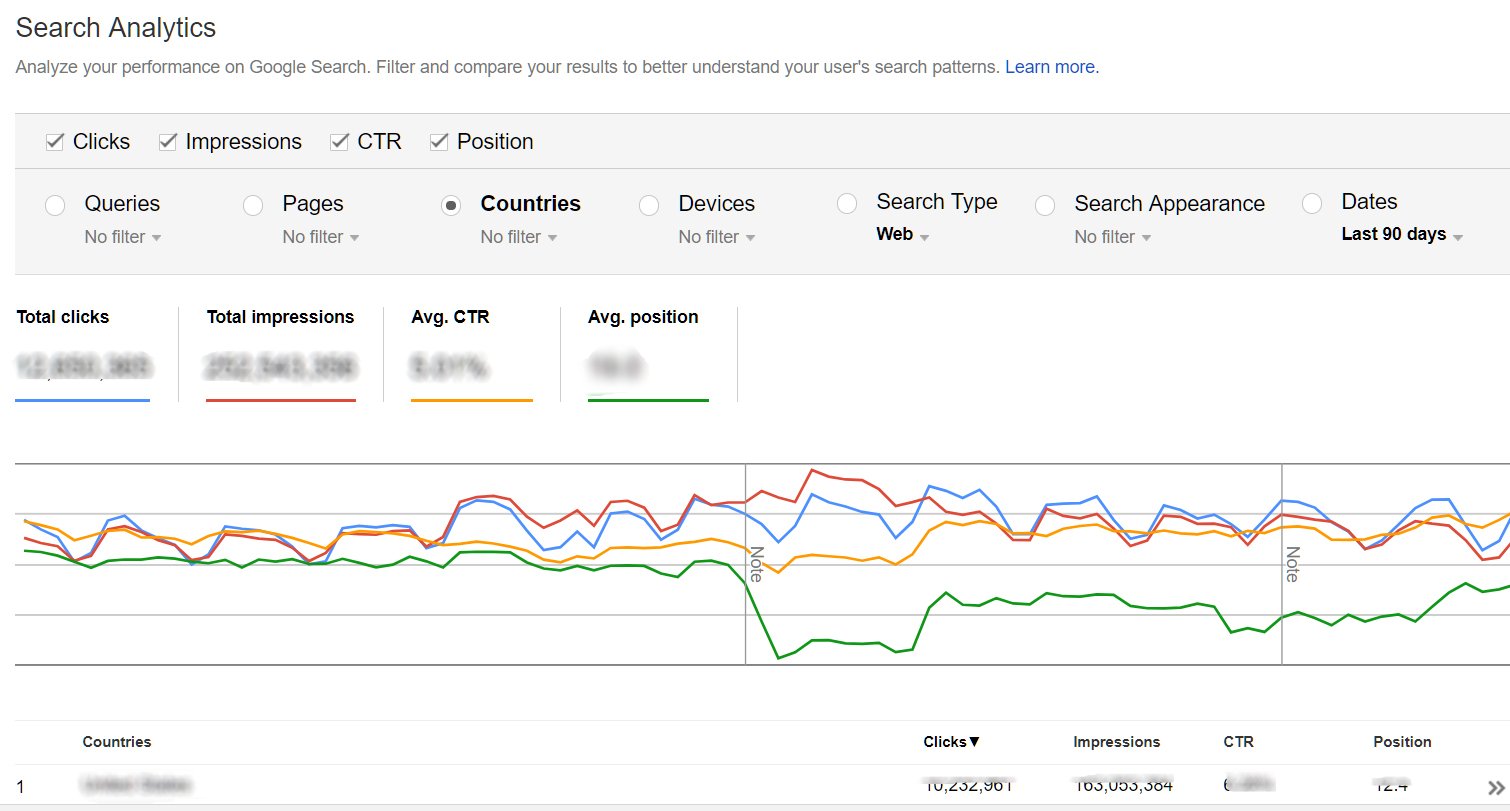
Search Analytics
This is the place where you will get all the keywords’ information for which
your site has been visible (got an impression). In addition to the keywords you
will also get the number of impressions, number of clicks, Click Through Rate
(CTR) and average position in the search analytics section.
Impression tells the number of times one webpage or a website have been
visible to the user for related keyword searches.
Number of clicks tells the number of times one website or a webpage have been clicked on SERP.
CTR or Click Through Rate is an equation,
CTR= (Total number of Clicks / Total number of Impressions) * 100
So let’s say, one web page has been visible 300 times and out of that 300
times, it has been clicked 60 times. So the CTR is (60/300)*100 = 20%
Average position tells where the webpage might have ranked across the
internet during a period of time for one keyword search.
In this section, you will see a list of keywords for which the website has at
least one impression. This part is very important to measure how your site is
ranking and performing for different keyword searches.
There are different filter options which you can use to filter these data as
you need.
Let’s say you want to find out the keywords your site is ranking for, from
one particular country. So you have to select the country filter and choose the
country of your need.
You may want to know the keywords those are being searched on mobile devices.
So you can select mobile from the devices filter and can get the entire
information of keywords for which your site is ranking from mobile devices.
Another very important filter is ‘Dates’ filter. Using this filter you can
compare the data (keywords, impressions, clicks, CTR and average positions) of
the current month with the previous month. You can also use a custom date range
(anything between last 90 days) to compare the data using this filter.
You will get a download button at the bottom of the page, for all those filters under search analytics section. You can use that download button to download all those different keywords’ data in excel format. This section will get you all keywords’ report from Google search engine which your clients may be asking for.
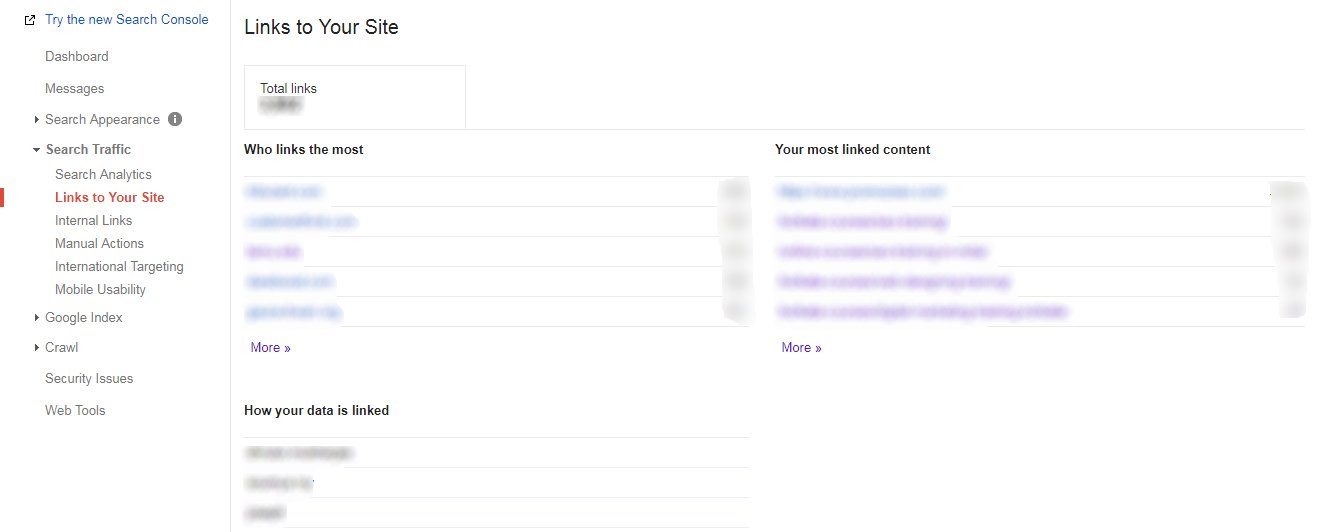
Links to your site
Links to your site will list all the inbound links which your website has
acquired till date and indexed by Google. This section not only shows the links
which you have built for your website yourself, but also those links which your
site might have earned. This section lists all the backlinks, as well as the
source websites where your site has those backlinks from. Additionally you can
get information about all the different anchor texts those have been used to
create those backlinks.
Links to your site section is very important to analyze your site’s
backlinks’ numbers and quality. You can download this data in excel format and
can send to your client if you are working as SEO freelancer or consultant.
Though it is also recommended to keep records of each link you are building
yourself separately in excel format.
This section also helps in identifying malicious and toxic links. You can disavow those risky backlinks using Google Webmaster tool if you think those are potentially harmful for your website and its performance.
Internal links
Internal links are very crucial for a website. These help to get more page
views, increase the dwelling time and decrease the bounce rate. From search
engines’ point of view, internal links help a website to get more crawling and
indexing. As a result site’s ranking improves a lot.
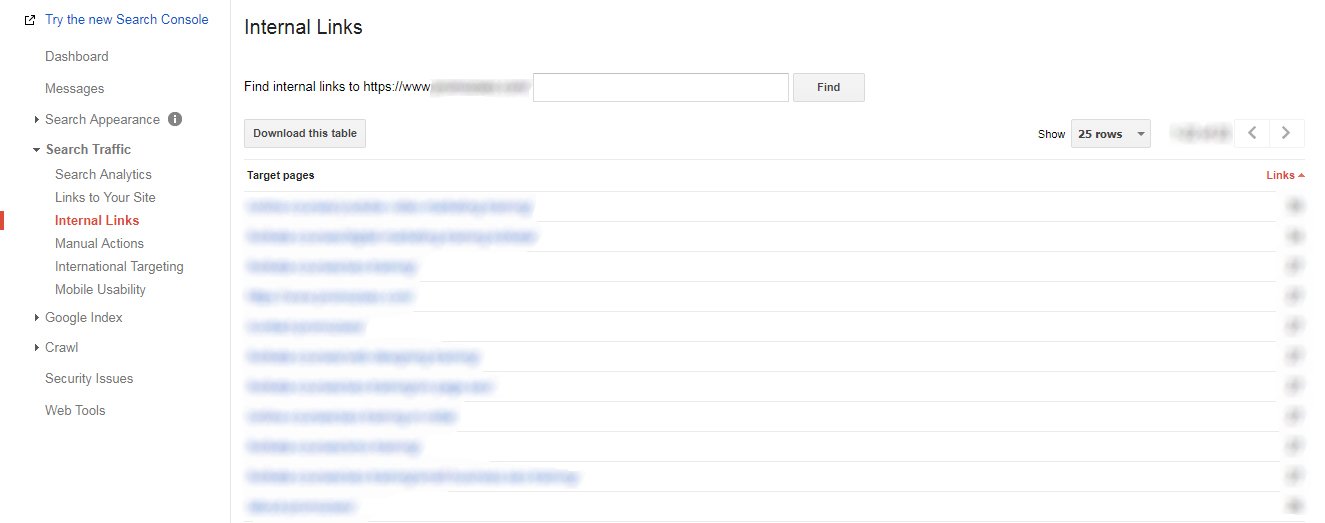
In this section, you will see all internal links created across the site. Periodically you can check this section to see if Google is listing the new internal links you are creating on the website.
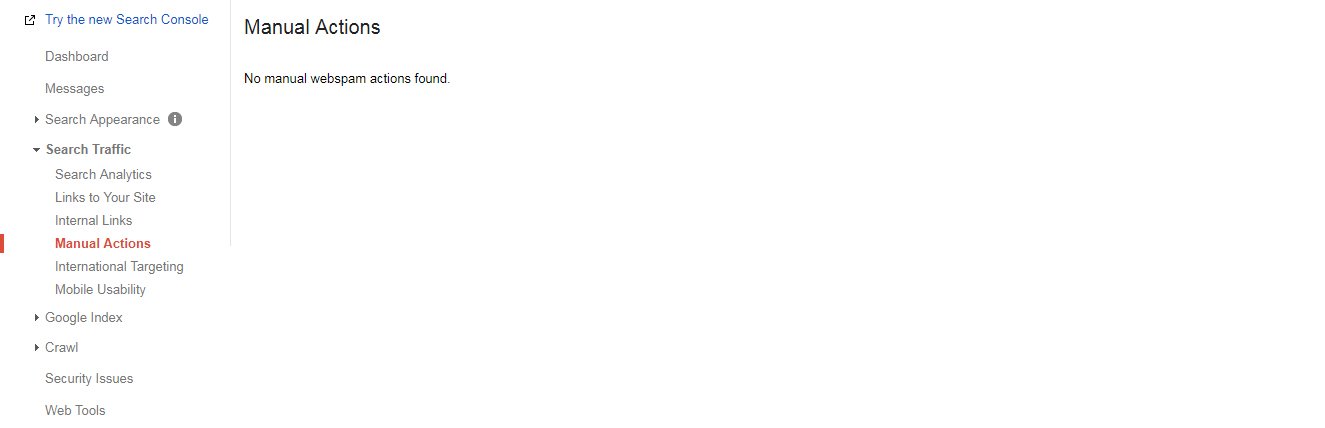
Manuals action
This is the place where you can see if Google is taking any manual action
against a website. If you see anything here it simply means that the site owner
or the webmaster or maybe the optimizer is doing optimization violating the SEO
guidelines.
There are different reasons for which Google may take manual action against a
website. The most important reason is, maybe the site owner or the optimizer or
maybe the webmaster is involved in building low-quality backlinks or purchasing
inbound links.
If you see a manual action notice, then you have to submit a consideration
request to Google. This needs immediate attention and also takes time. Couple of
things you need to do immediately.
Analyze all your backlinks and anchor texts manually or using backlink
analysis tools. If you see there are over-optimized anchor texts or toxic links
pointing to your site, then you have to try to correct (de-optimize or remove)
those by contacting those websites manually. In case, you couldn’t correct few
of those toxic links, then you should disavow those using Google Search Console
to inform Google to uncount (nofollow) those backlinks.
Remember you have to try to contact each of those site owners by email from
where your site has got toxic backlinks. Keep a record of those contacts and you
can additionally submit that at the manual action section.
Manual actions can be taken by Google for poor quality, copied, thin and spam contents too. Examine your contents’ quality, content optimization level (over optimized contents will create problems), content volume, content freshness etc. to get the manual action revoked against the website.
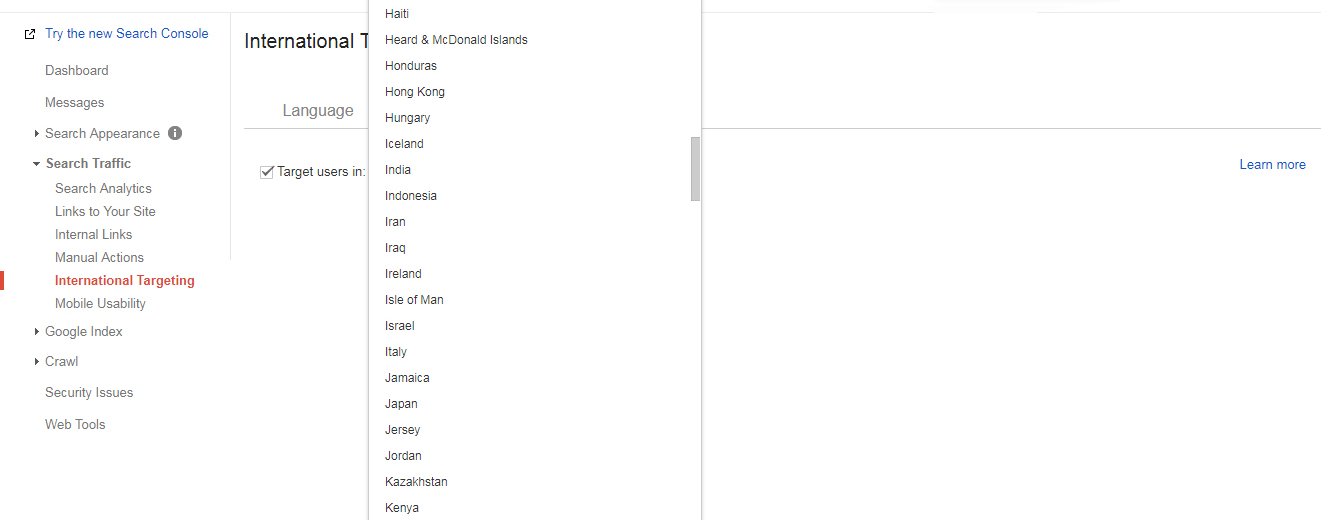
International targeting
This section is very important for all the sites which have contents created
or translated into multiple languages for different geography and audiences.
If you have such a site which has contents written in multiple languages then
you have to use proper Hreflang tags. Let’s say you have created one content in
two languages, German and French, and posted those on two different webpages on
the website. Then you have to use the proper Hreflang tags on both the webpages
to let Google know about the content created in two languages for different set
of countries and audiences.
From this section, you can also target a particular country if you have a
website with GTLD (Generic Top Level Domain). You can select the country you
want to target or else you may keep this unchanged. Even if you do not select
any country from the list, still Google can identify your business location from
Google My Business (if your business has any verified account on GMB).
If you have a CcTLD (Country Code Top Level Domain) website, then you won’t have the country selection option as your domain is already targeted for a particular country.
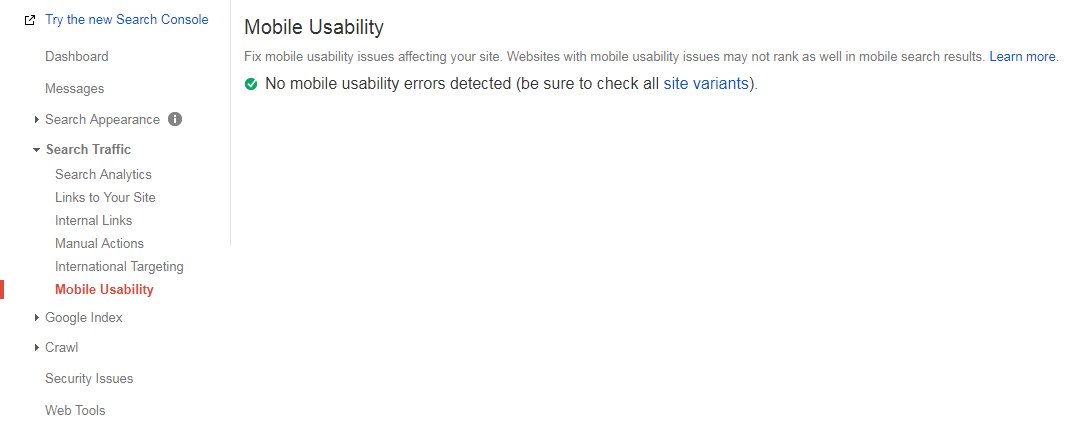
Mobile usability
Mobile usability section tells about the website’s mobile friendliness.
Google’s ‘mobile first’ policy makes it very important to build our websites
mobile device friendly. Google recommends Responsive Web Design (RWD).
If you are creating your website please make sure that your site is mobile
friendly, preferably go for the responsive design approach. And in case you
already have a website which is not designed properly for mobile devices, then
you may have to consult with your web designer or developer to make it mobile
device friendly.
From this section, you can debug all those issues Google is facing during your site’s mobile indexing. There can be major three errors listed here. First, check whether your site is opening with a horizontal scroll on a mobile device or not. Second, check if different links of your site are easily clickable on a smartphone or not. Third, check whether your site’s viewport is properly configured or not. If you see any of these errors you have to correct those as early as possible.
Search Appearance
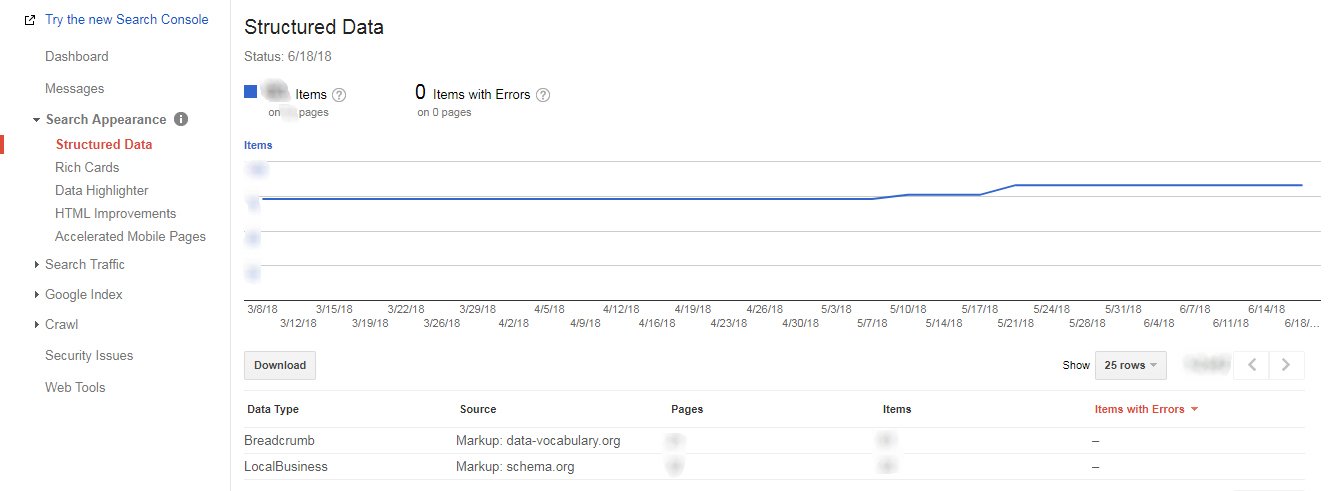
Structure Data
From structure data section of Google Webmaster tool, you can see all the
structure data errors (along with all the required details) your site has.
If you are not aware of the structured data, you should know that this is one
of the most advanced techniques you can implement on your site. Though it does
not directly impact the ranking, but if you use few types of structured data,
your site may rank with rich snippets on search engine result page. These
engaging rich snippets help in increasing click-through rate and indirectly help
to get better ranking over time. If you are not using structured data on your
website, start using those as early as possible. There are many online tools and
plugins available which you can use to create structure data codes (Schema
JSON-LD) for your site.
From this section, you will get a list of structure data error details. You have to check those individually and correct those as and when required. Additionally, you can use the structured data testing tool from Google Search Console to know the exact reasons of those errors.
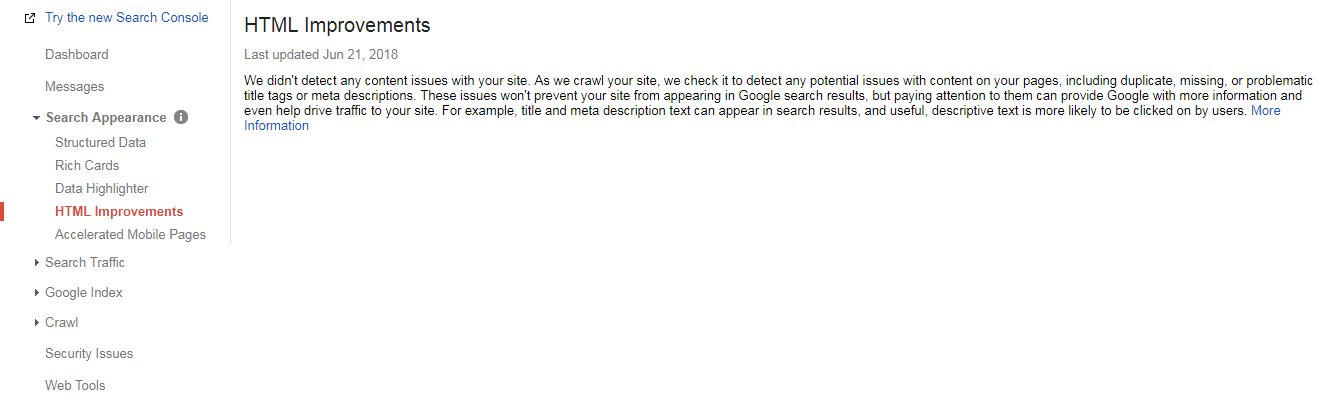
HTML improvements
HTML improvements section lists 7 important error messages of your website.
- Missing Page Title: If your site has one or multiple pages without any page title, those page URLs will be listed here. Remember missing page title is a semantic error. You have to revisit those pages and write optimized page titles.
- Duplicate Page Title: You will see this error message along with the page URLs which have the same page titles. This is a big problem for overall site optimization and will harm your organic ranking. Please create unique, relevant and optimized page titles for each of those pages.
- Long Page Title: This error happens when your site has one or multiple URLs where the page titles are more than 70 characters long. Edit those pages and rewrite the page titles within 70 characters.
- Short Page Title: Short page title error means your site has pages where page titles are really short. Edit to make those up to 70 characters long.
- Duplicate Meta description: Same like the duplicate page title error, duplicate Meta description error happens when you have one or multiple pages with the same Meta description. Again this can cause a really big problem for the site. Edit each of those pages to recreate unique and relevant Meta descriptions.
- Long Meta Description: Google Search Console shows these errors when it gets Meta descriptions more than one sixty (160) characters long on one or multiple webpages. You should rewrite all page Meta descriptions within 160 characters.
- Short Meta Descriptions: This happens when your site has multiple pages with very short Meta descriptions. Rewrite to make those maximum 160 characters long.
Unlike missing page title, missing Meta description is not a semantic error.
We may intentionally create a webpage without a Meta description. Even some time
we may see a different Meta description on search engine result page than the
actual Meta description written on the webpage.
Accelerated mobile pages (AKA AMP)
Accelerated Mobile Pages or in short AMP are created to make websites faster
on mobile devices. Site speed is one of the strongest ranking signals today.
Hence we should create these pages for better mobile indexing and ranking.
There are specific techniques to create Accelerated Mobile Pages. This section will list all the errors Google detected on the accelerated Mobile Pages of a website. We should check this section periodically to analyze if there are any errors happening with site’s Accelerated Mobile Pages. Additionally, we can use AMP testing tool on Google Search Console to get more detailed error messages.
These are the most important features of Google Search Console but in
addition to these, we see some other details which we can further explore.
Security Issues: This message section shows if your site
has any security issues. Security issue may happen due to many reasons, like,
malware attracts, unwanted code insertions etc. To enhance the security of a
website, it is suggested to use https (Hyper Text Transfer Protocol Secured).
Https is recommended by Google and today it is a ranking factor as well.
Site Settings: In this section, you will get the options to select the preferred version of the domain you want Google to index. You will get three different options here. First, ‘don’t set a prefer domain’. Second, display URLs with www. Third, display URLs without www. One website must open either with www or without www. Site should be redirected permanently to any of these two when someone is opening it on a browser. We can do this using htaccess file or using Search Console’s preferred domain options. Select either the second or the third option (i.e. either with www or without www) to set the preferred domain version of your website.
Conclusion
Google Search Console tool may apparently look very difficult and
complicated, but this is one tool which will get almost all the data you may
need to improve your site’s performance.
Google updates this tool periodically. They introduce different new features
or enhance already existing options with more advanced functionalities.
If you are a search engine optimizer working with clients or optimizing your own websites, this is the one important tool which you cannot ignore at all. If your site is not already added with Search Console, add it as early possible. This will get all those data which you may not find in such details using any other tool.
Want more info

GENERAL LINKS
CONTACT PROMOZSEO
PromozSEO
Harish Chandra Dutta Rd, Panihati,Sodepur, Kolkata - 700114,
West Bengal, India.
PHONE: +91-7278581909
ALTERNATE: +91-9804457170
EMAIL: info@promozseo.com